5 minutes
Adulting with your AWS accounts (part 2 of 2)
In part 1 we created a new AWS account to manage our AWS Organization, and added an existing AWS account to our organization.
How can our team get easy console access to both the existing accounts in the organization, and easily gain access to subsequent accounts?
AWS Identity Center
AWS Identity Center is a free Single Sign-On service to manage access to multiple AWS accounts with a single login.
As the root user in the Management account for your Organizations, navigate to the Identity Center console.

Take the steps to enable Identity Center in your account. Since you’ve already set up Organizations, all pre-requisites have been fulfilled.
Create a group
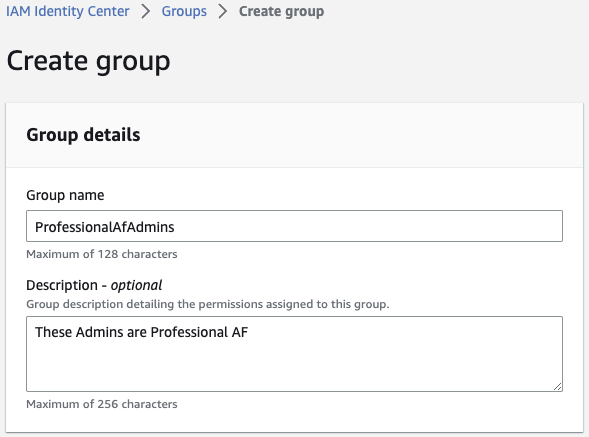
To start, click Groups within IAM Identity Center and click Create group.
Start with a group we’ll give full admin privileges. Don’t worry about adding users yet.
Create a Permission Set
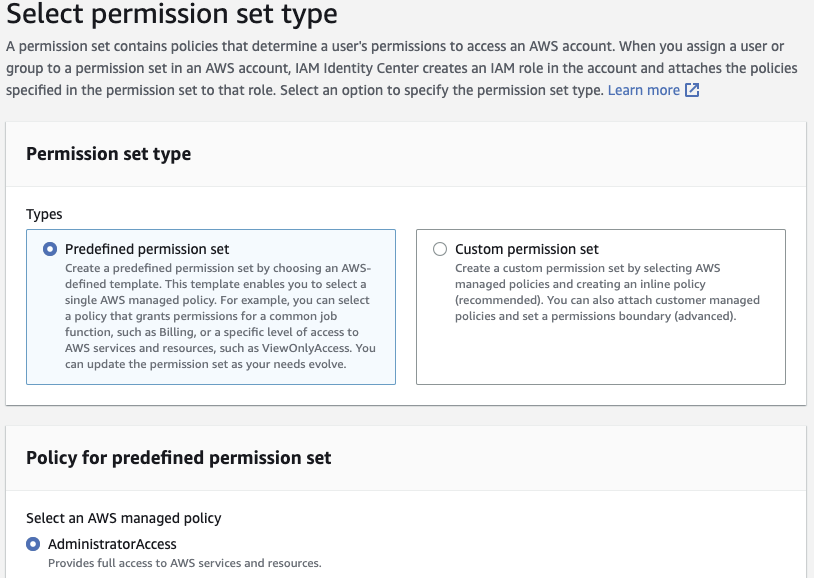
Click Permission sets on the left side the Create permission set.
Start with a Predefined permission set and choose AdministratorAccess. Click Next.
⚠️ I’m showing
AdministratorAccessin this example, but I don’t know your team. Please understand what you’re doing and provide appropriate privileges for your team.
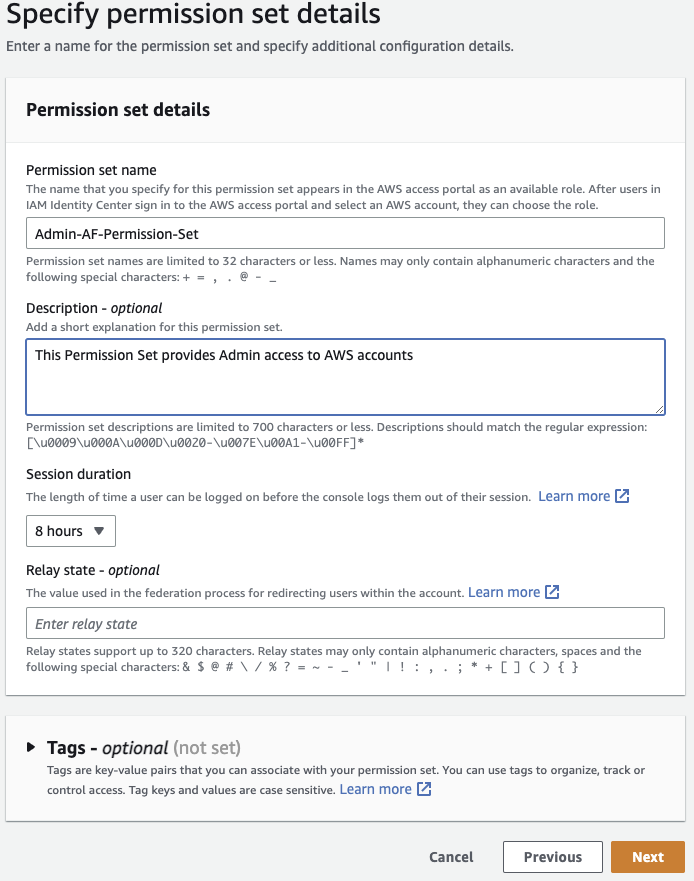
Optionally name your permission set, provide description, and set a sane Session duration that won’t force your team to authenticate once an hour. You can ignore Relay state for now. Click Next.
Review the details and click Create.
Assign Group and Permission set to account
Navigate to Multi-account permissions -> AWS accounts. Click on your newly invited account (Taylor in my example).
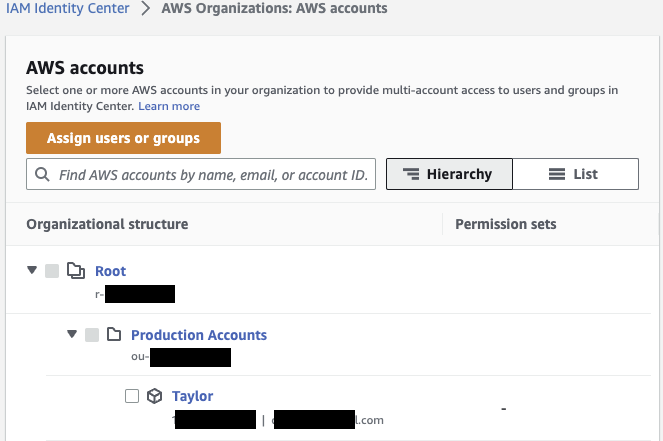
Click Assign users or groups.
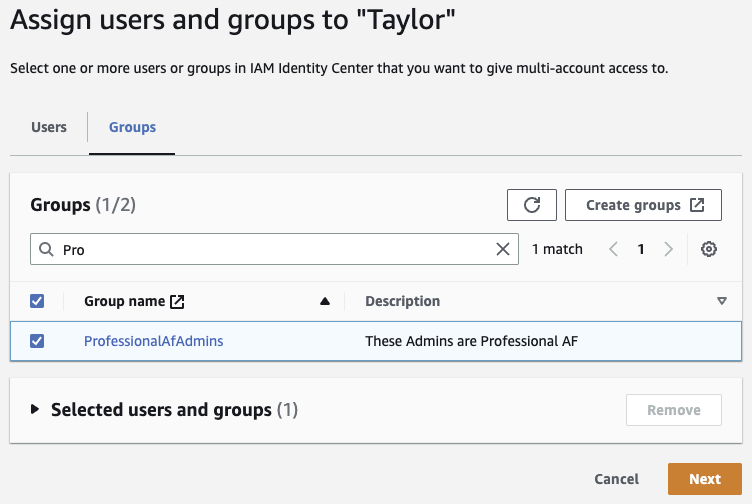
Select the Group you just created (ProfessionalAfAdmins in my example). Click Next.
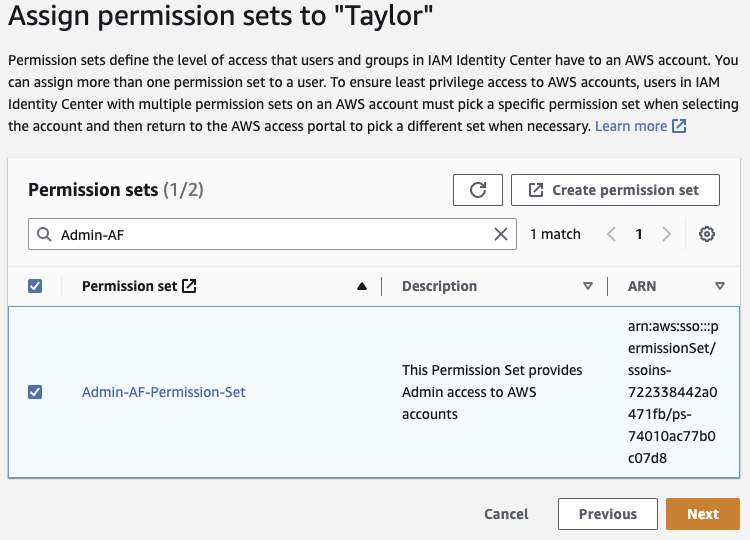
Check the box next to the Permission set you just created. Click Next.
Review the assignment, and click Submit.
Create Users
You have a Group and a Permission set assigned to your account. Now for Users.
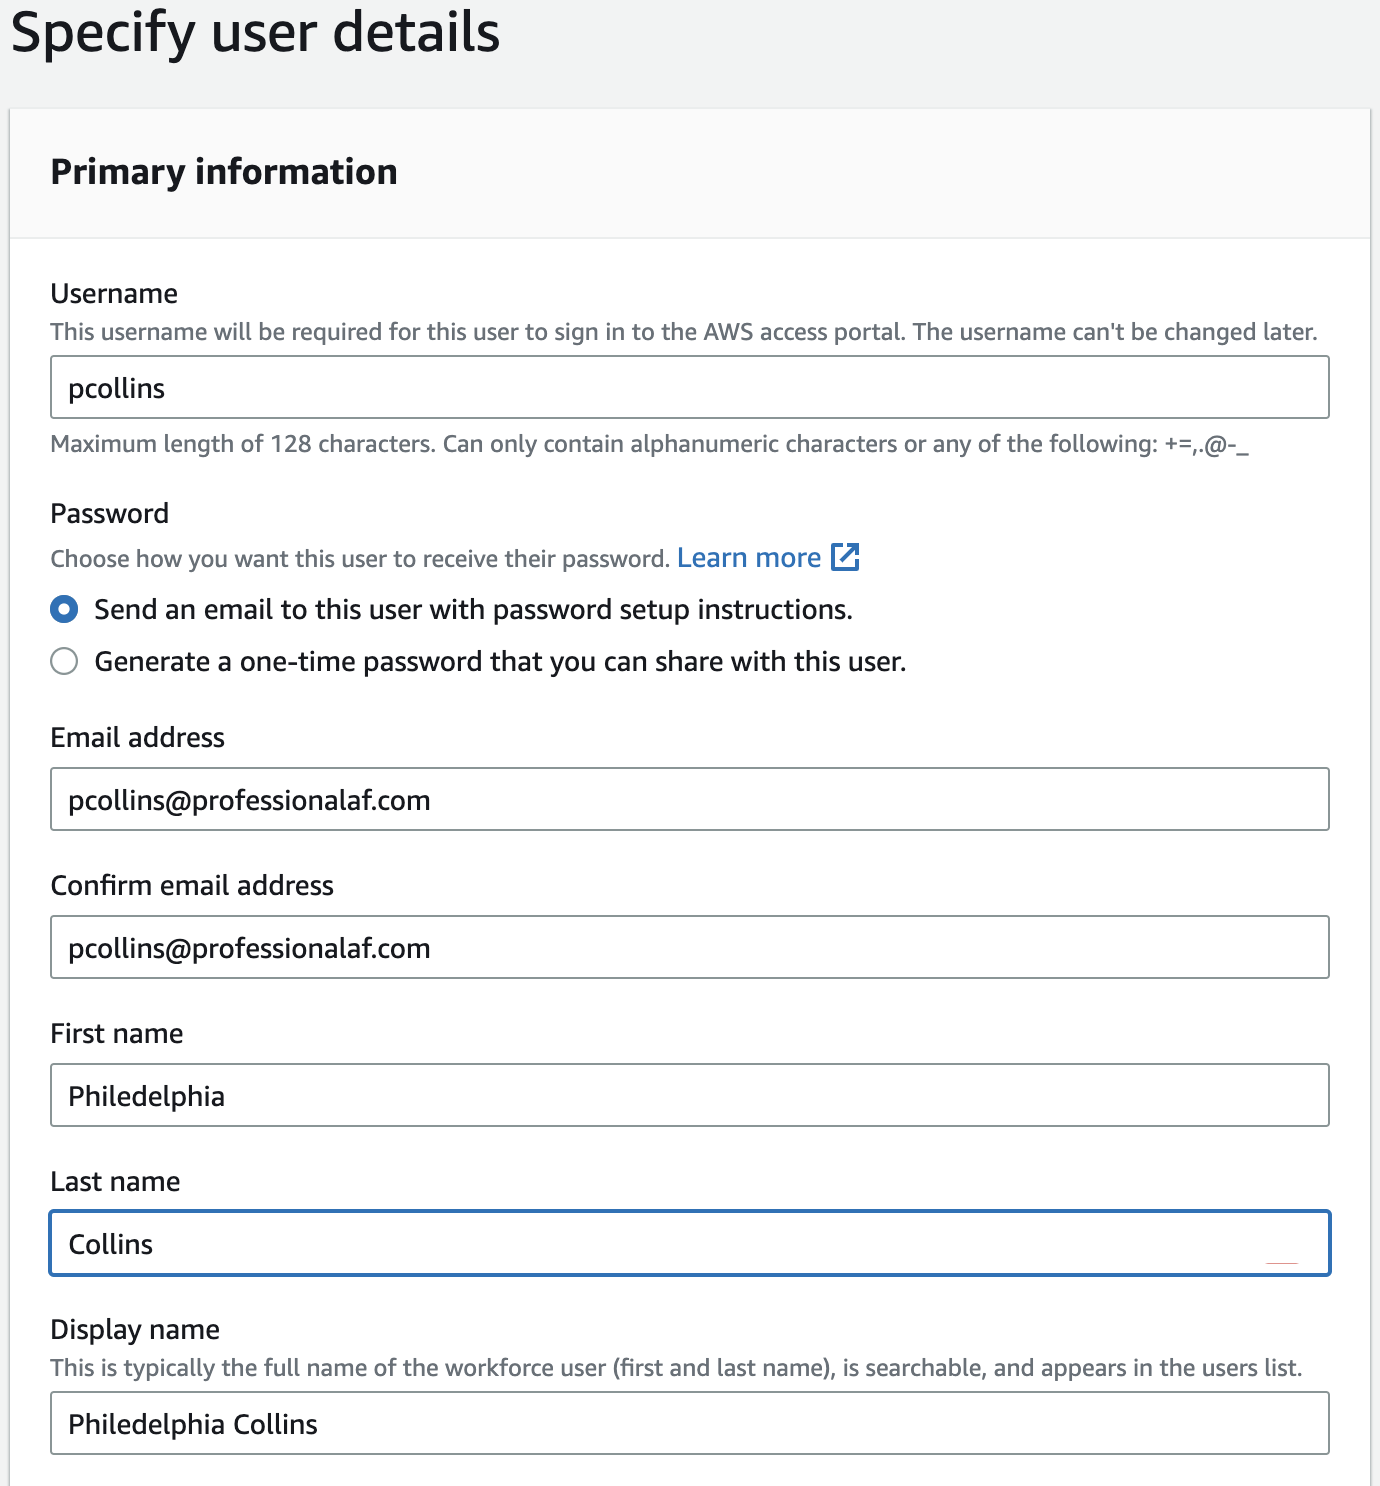
Navigate to Users -> Add User. Enter user details for a person on your team. Optionally add more details. Click Next.
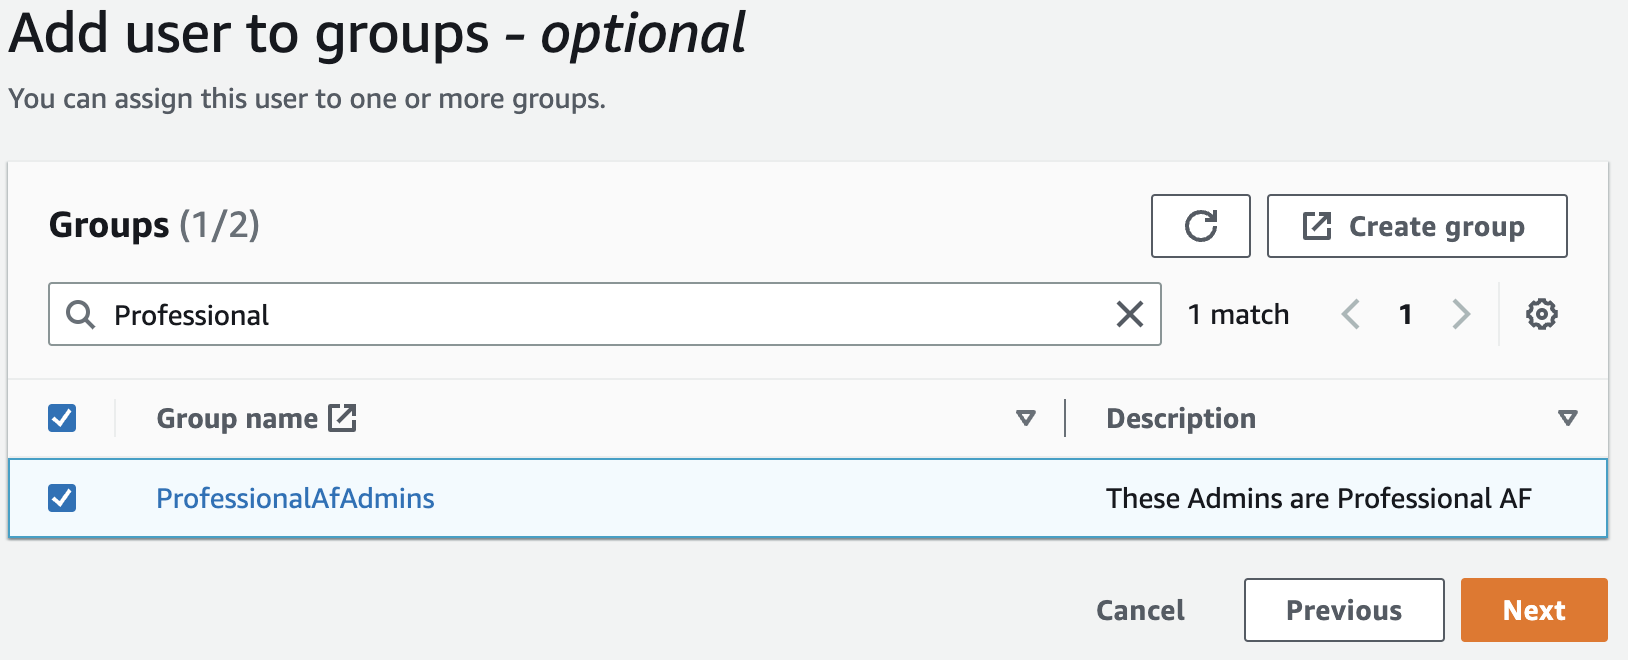
You’re given the option to add this new user to a group. Add them to the Group you’ve just created (ProfessionalAfAdmins in this example). Click Next.
Review the detials, and click Add user.
So how do my users log in?
Let’s shift to the perspective of the user for whom you just created.
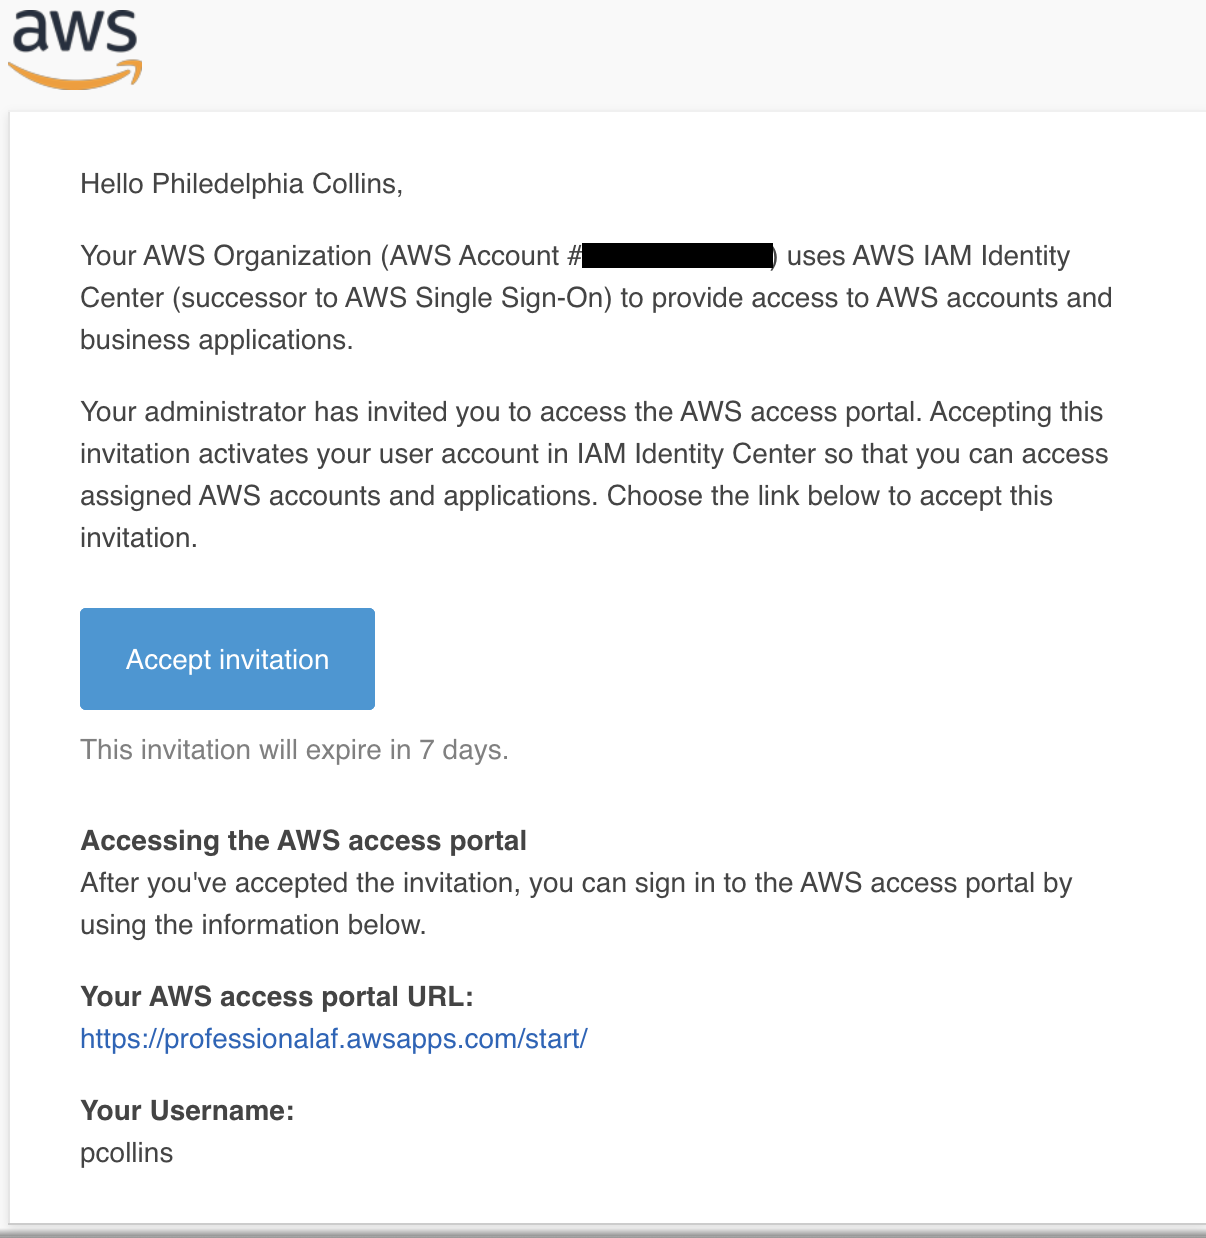
They’ll have received an email with a link to accept the invitation.
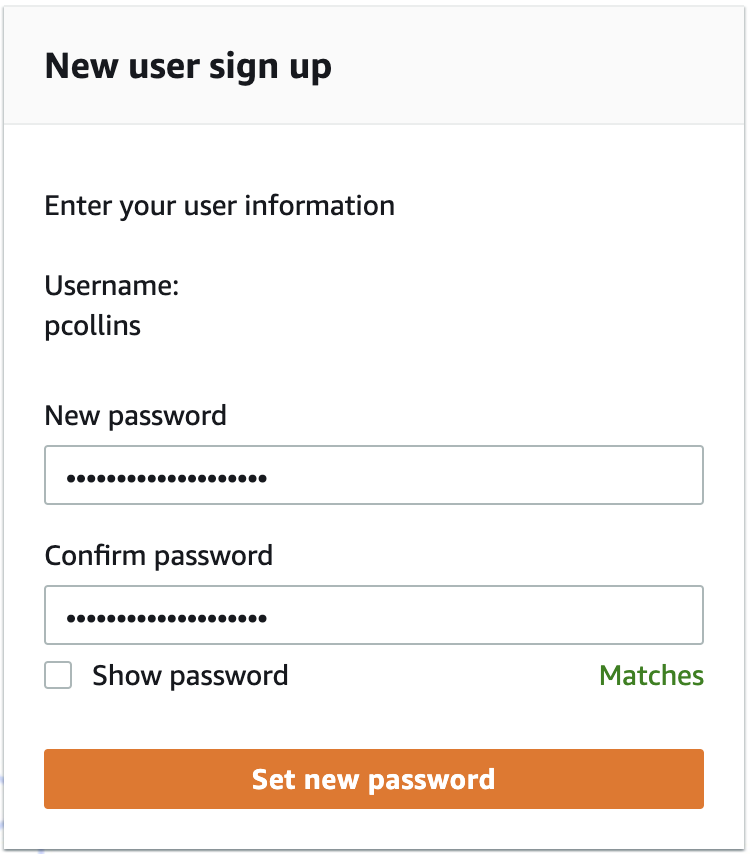
Clicking that link will prompt them to set their password. Fill it out and click Set new password.
Once set, they’ll log in and see AWS accounts they have access to.

The user can log in to the Management Console as well as get temporary credentials for Command line or programmatic access.
Let’s do better with programmatic access
When working with many AWS accounts, copy/pasting temporary credentials from your AWS access portal is cumbersome. Let’s get set up to use the Token provider.
When using the AWS CLI, the configuration and credentials files are used. Rather than placing long lived access/secret keys, or copy/pasting from the AWS access portal, configure it to use AWS IAM Identity Center.
In ~/.aws/config add the following sso-session config.
[sso-session my-sso-session] <-- name this anything
sso_region = us-east-1 <-- your region
sso_start_url = https://my-sso-portal.awsapps.com/start <-- The AWS access portal URL
sso_registration_scopes = sso:account:access

[profile account1]
region = us-east-1
sso_session = my-sso-session <-- matching the sso-session above
sso_account_id = 111111111111  <-- account you want to access
sso_role_name = Admin-AF-Permission-Set  <-- permission set you created
Now as a developer, I can start my day with a login
aws sso login --profile account1
This will launch your browser and prompt you to log in with your sso credentials. Once logged in click Allow.
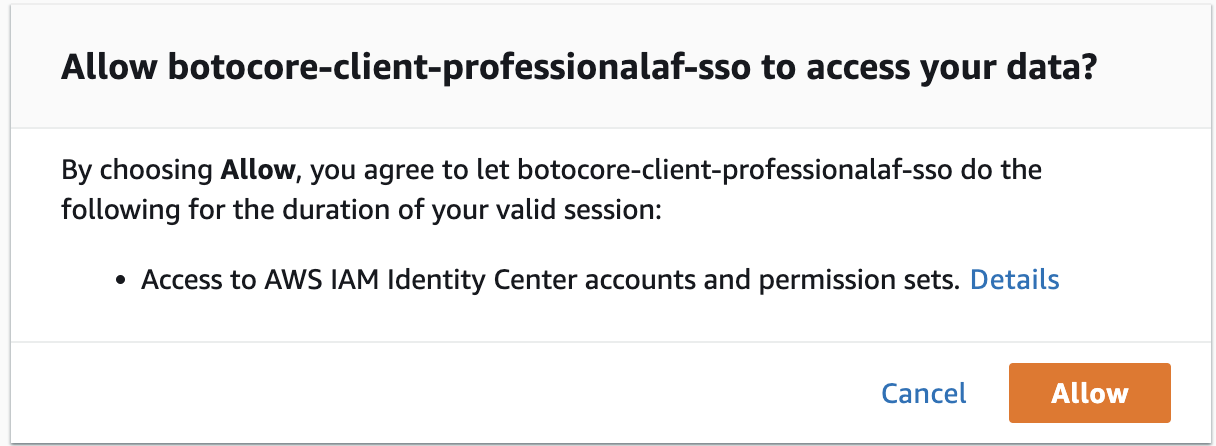
Back in your terminal, you’ll see a successful login
aws sso login --profile account1
Attempting to automatically open the SSO authorization page in your default browser.
If the browser does not open or you wish to use a different device to authorize this request, open the following URL:

https://device.sso.us-east-1.amazonaws.com/

Then enter the code:

SQSX-VKBN
Successfully logged into Start URL: https://professionalaf.awsapps.com/start
Let’s see who we are.
aws sts get-caller-identity --profile account1
{
    "UserId": "AROASPSJDGKCFEOTYJTBM:pcollins",
    "Account": "111111111111",
    "Arn": "arn:aws:sts::111111111111:assumed-role/AWSReservedSSO_Admin-AF-Permission-Set_f32254ff98a16ce4/pcollins"
}
If only working in a single account for an extended period of time, export your profile as an environment variable so you don’t need to add --profile account1 to every cli call.
export AWS_PROFILE=account1
aws sts get-caller-identity # no profile set
Adding accounts in the future
As you add more AWS accounts to you Organization, and set up access in AWS Identity Center, you can easily add subsequent accounts to your configuration
[profile some-other-account]   <-- subsequent accounts you add via AWS Organizations
region = us-east-1
sso_session = my-sso-session
sso_account_id = 222222222222  <-- other account number
sso_role_name = Admin-AF-Permission-Set
Clean up existing IAM users
Using the steps above, ensure you have users with access to your newly created management account, as well as your existing AWS account that was invited to your organization.
Provided the permissions sets have sufficient privileges, you no longer need to log in with your root credentials (with few exceptions).
You can also start removing IAM users from your existing account once you’ve added the appropriate users to the appropriate groups within AWS IAM Identity Center.
Conclusion
These steps set you up for sucess as you grow your footprint on AWS. You now how simple ways:
- To manage multiple AWS accounts (and easy to add new accounts)
- To manage access and privileges to different Organizational Units
- For developers to authenticate to multiple accounts with low risk of compromising access/secret keys