3 minutes
Adulting with your AWS accounts (part 1 of 2)
Your side project has taken off. Your startup got funded. Your team is growing.
Well done!
You also have a single AWS account containing:
- Dev, staging and prod environments comingled together
- 14 IAM users with random permissions (who is
test-user-dont-delete?)- 8 users with Secret/Access keys that haven’t been used in 267 days
- Dozens of randomly named resources across dozens of AWS services that you’re afraid to touch
Your account is a mess and it’s time to level up with what goes where, and who accesses what.
Time for some adulting
To start your adulting journey you need the following:
- Multiple AWS accounts and an easy way to manage them (topic of this post)
- A simple and secure way to grant users access and authenticate to these accounts (part 2)
Let’s start with managing accounts.
Why do I need multiple accounts?
Many reasons, and it’s easier to manage than you think. You don’t pay more for multiple accounts. You only pay for resources (that carry a cost) deployed in your acccounts.
Let’s create one account to manage them all.
Create a new AWS account
Create a fresh AWS account. This will be your “Organizations” account where you’ll manage all other accounts (including your existing account).
Follow the steps here to create a new account, and don’t forget to add MFA to your root account.
Don’t create an IAM user at this point. We’re going to take some actions as the root user, then never log in as the root user again (see part 2).
Set up AWS Organizations
In the AWS console, navigate to Organizations.

Here, create a new Organization.
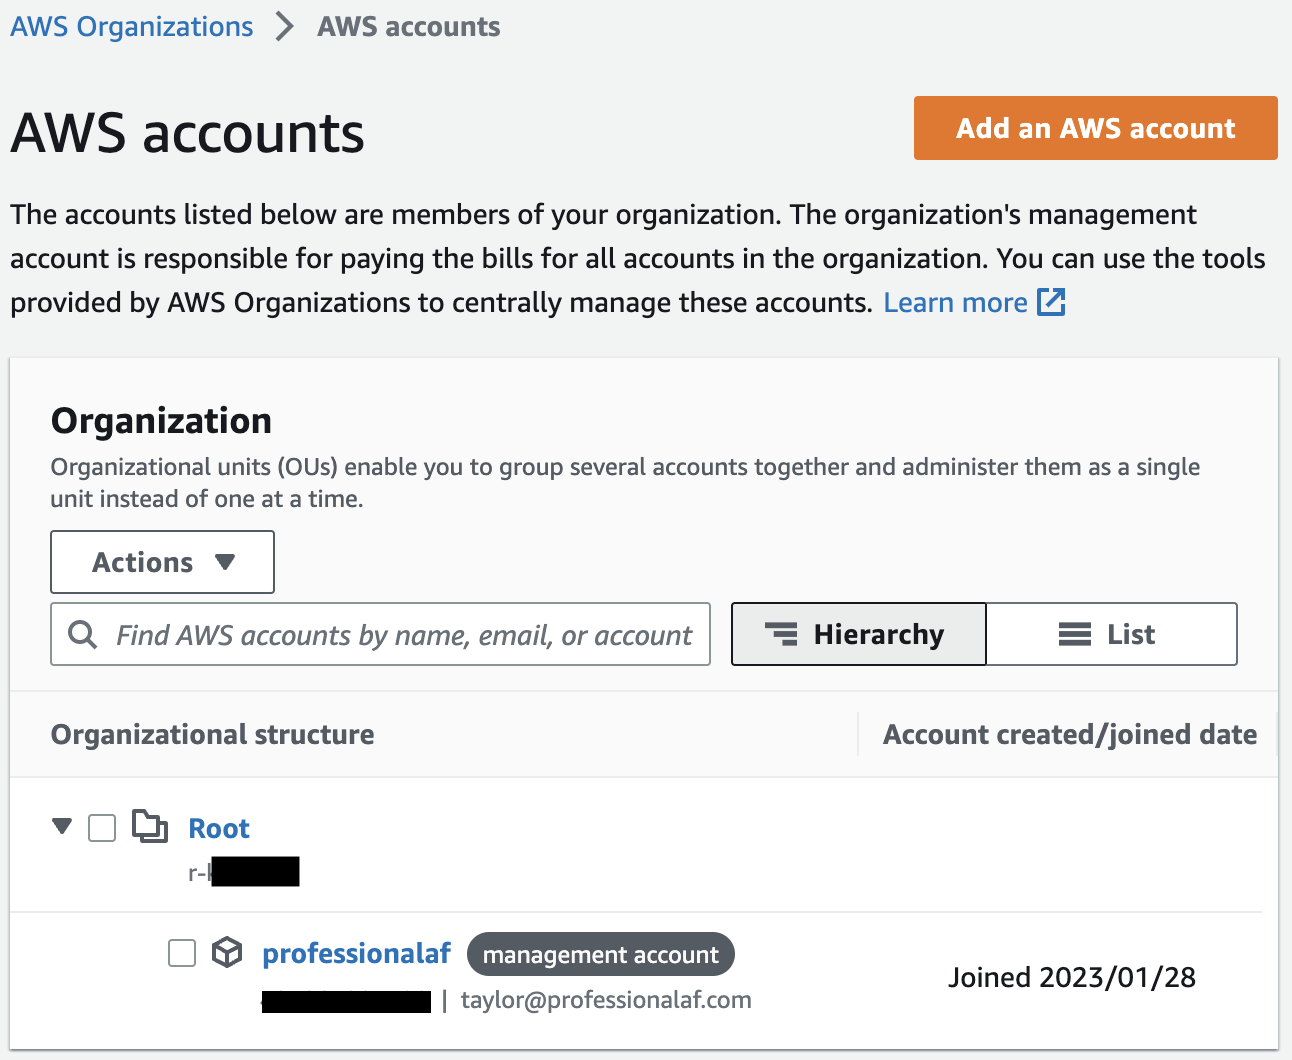
Once created, you’ll see your Organization showing one management account (the account you’re logged into).
Now we add your existing AWS account. Click Add an AWS Account.
Choose Invite an Exisiting AWS Account and add the account number of your exising account.
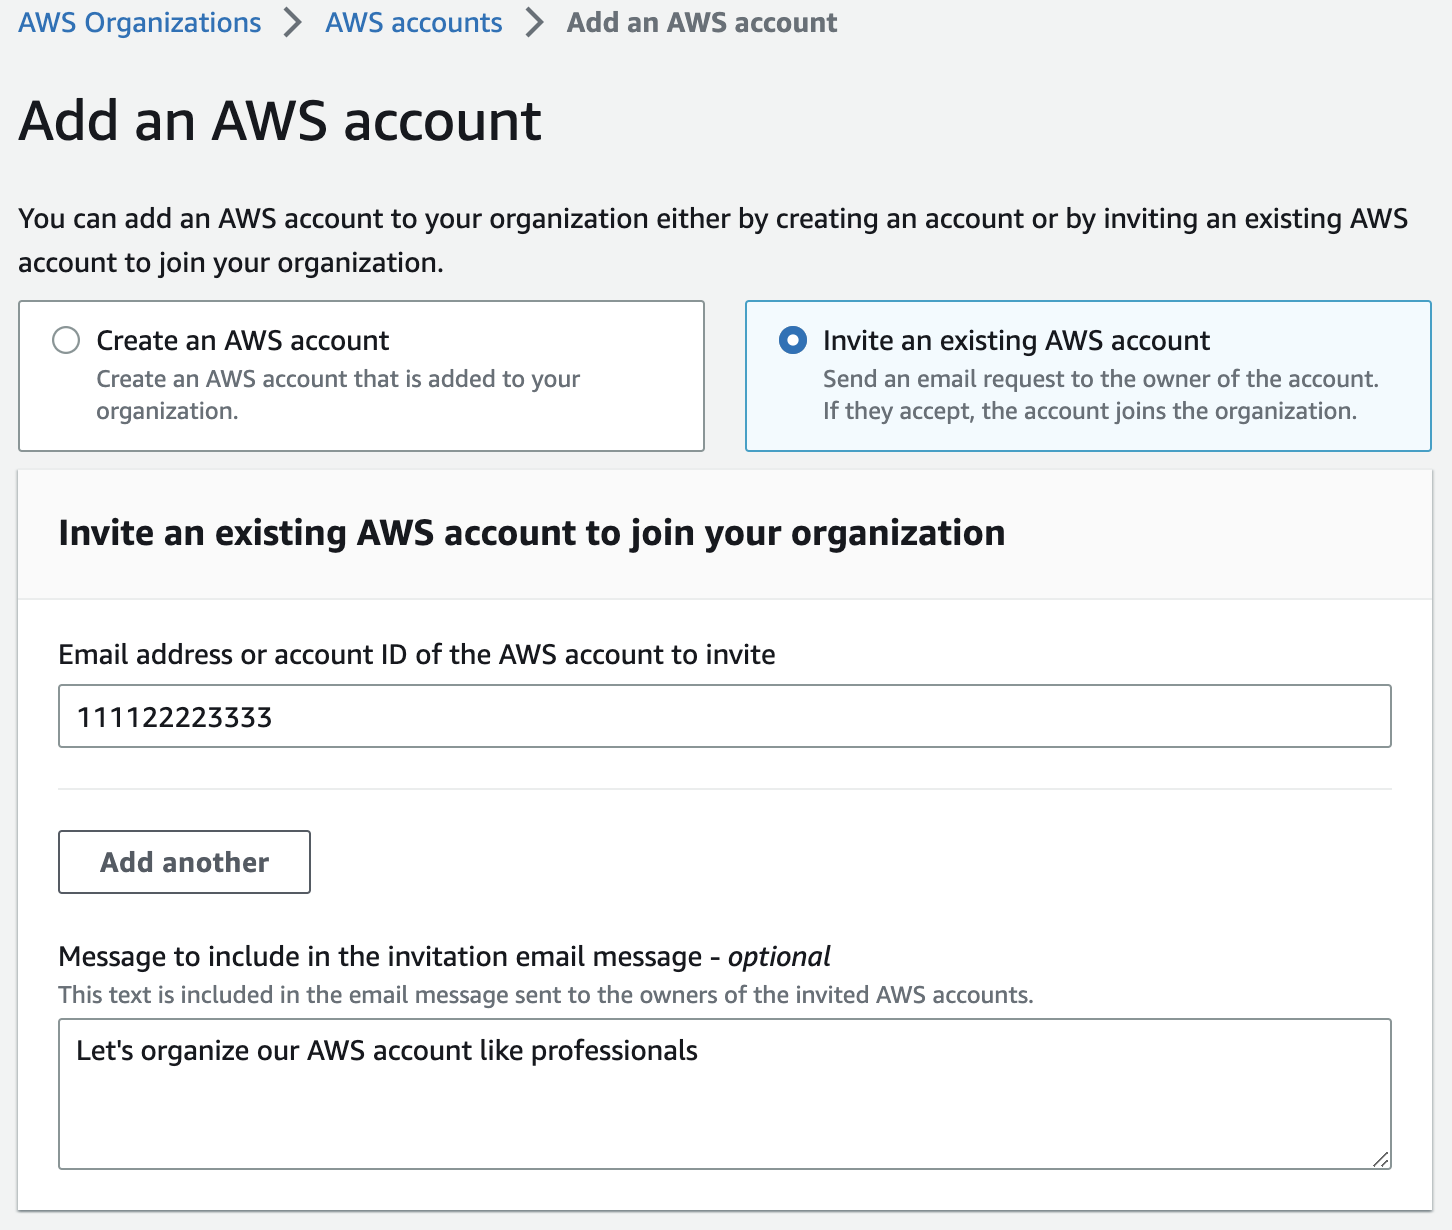
Add existing AWS account to your organization
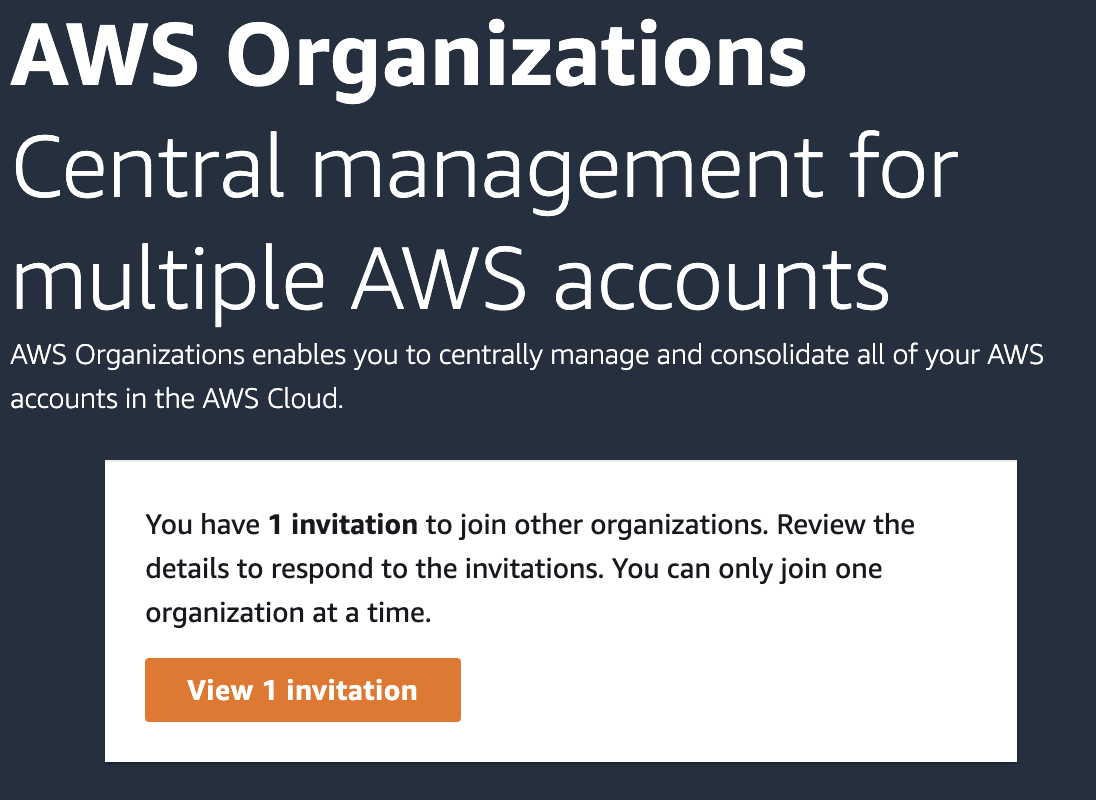
Log into your existing AWS account (the one filled with deployed resources), and navigate to the Organizations console, where you’ll see there is a pending invitation. Click View 1 Invitation.
Verify the details of the invite and click Accept Invitation.
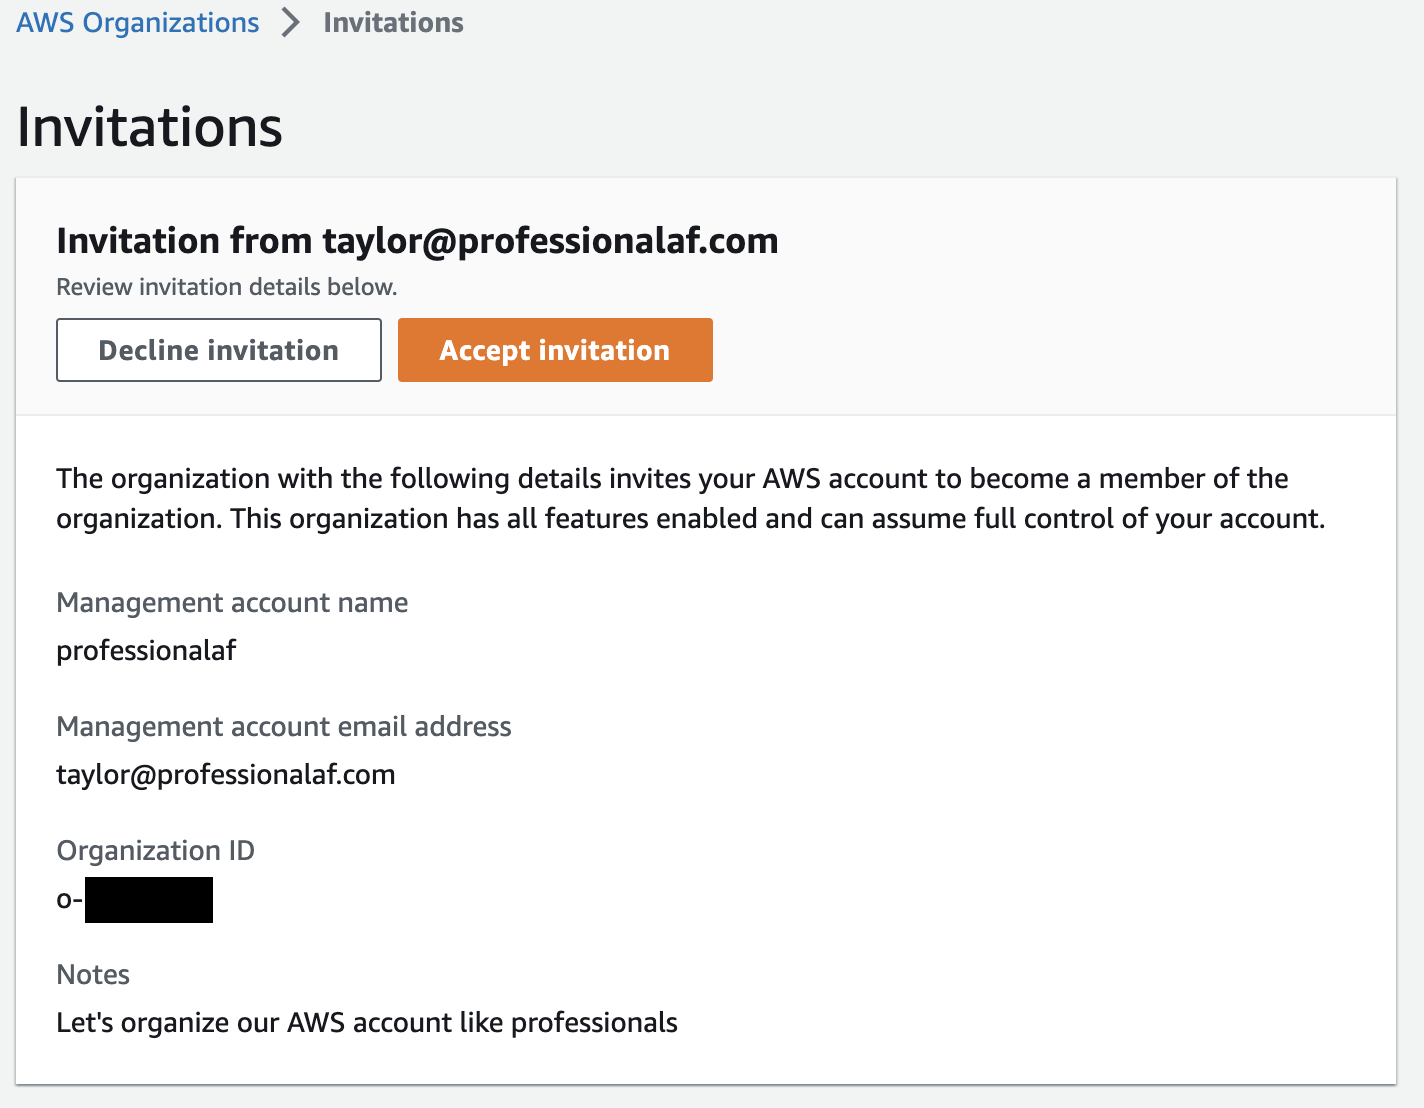
Billing for this account now rolls up to the newly create management account.
Back to root organizations account
Back in your new management account (still signed in as root user), you can see your newly added account.
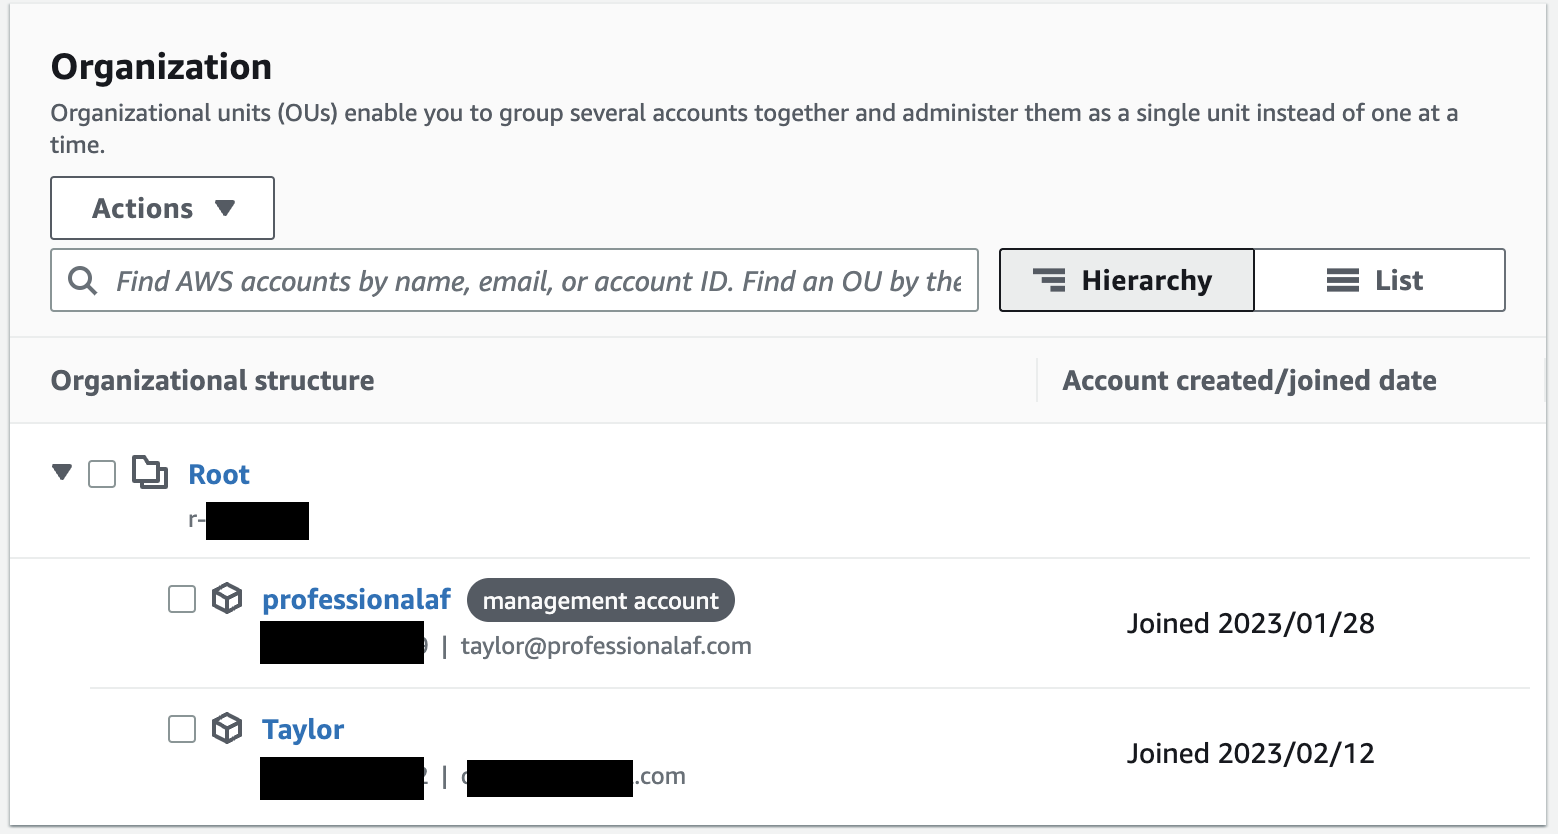
Let’s create some organizational structure, starting with an Organizational Unit (OU).
Create Organizational Unit(s)
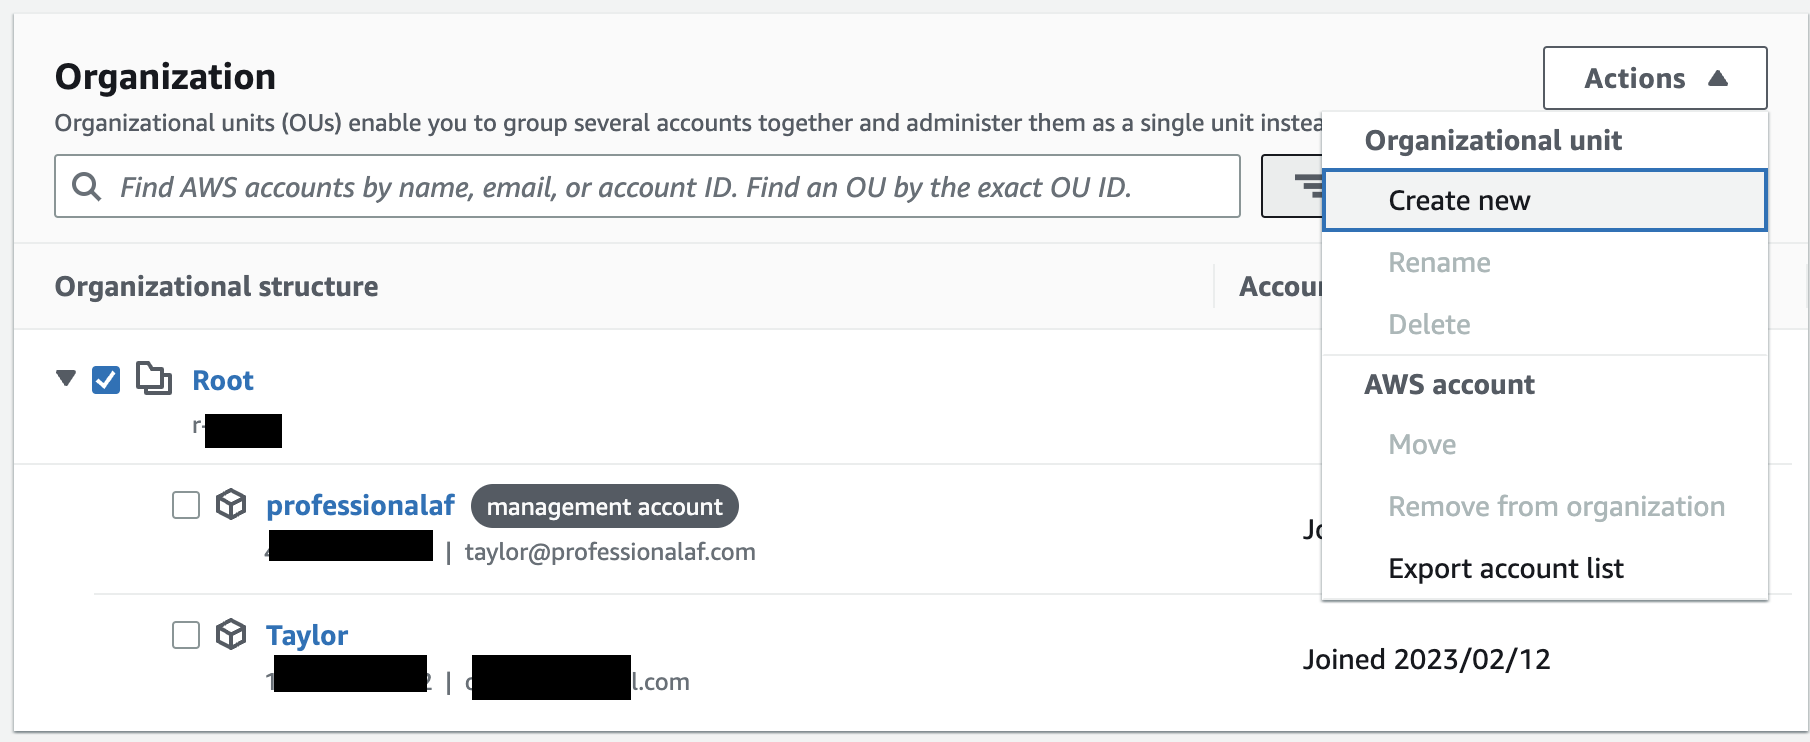
Check the box next to Root and click Actions -> Organizational Unit -> Create New.
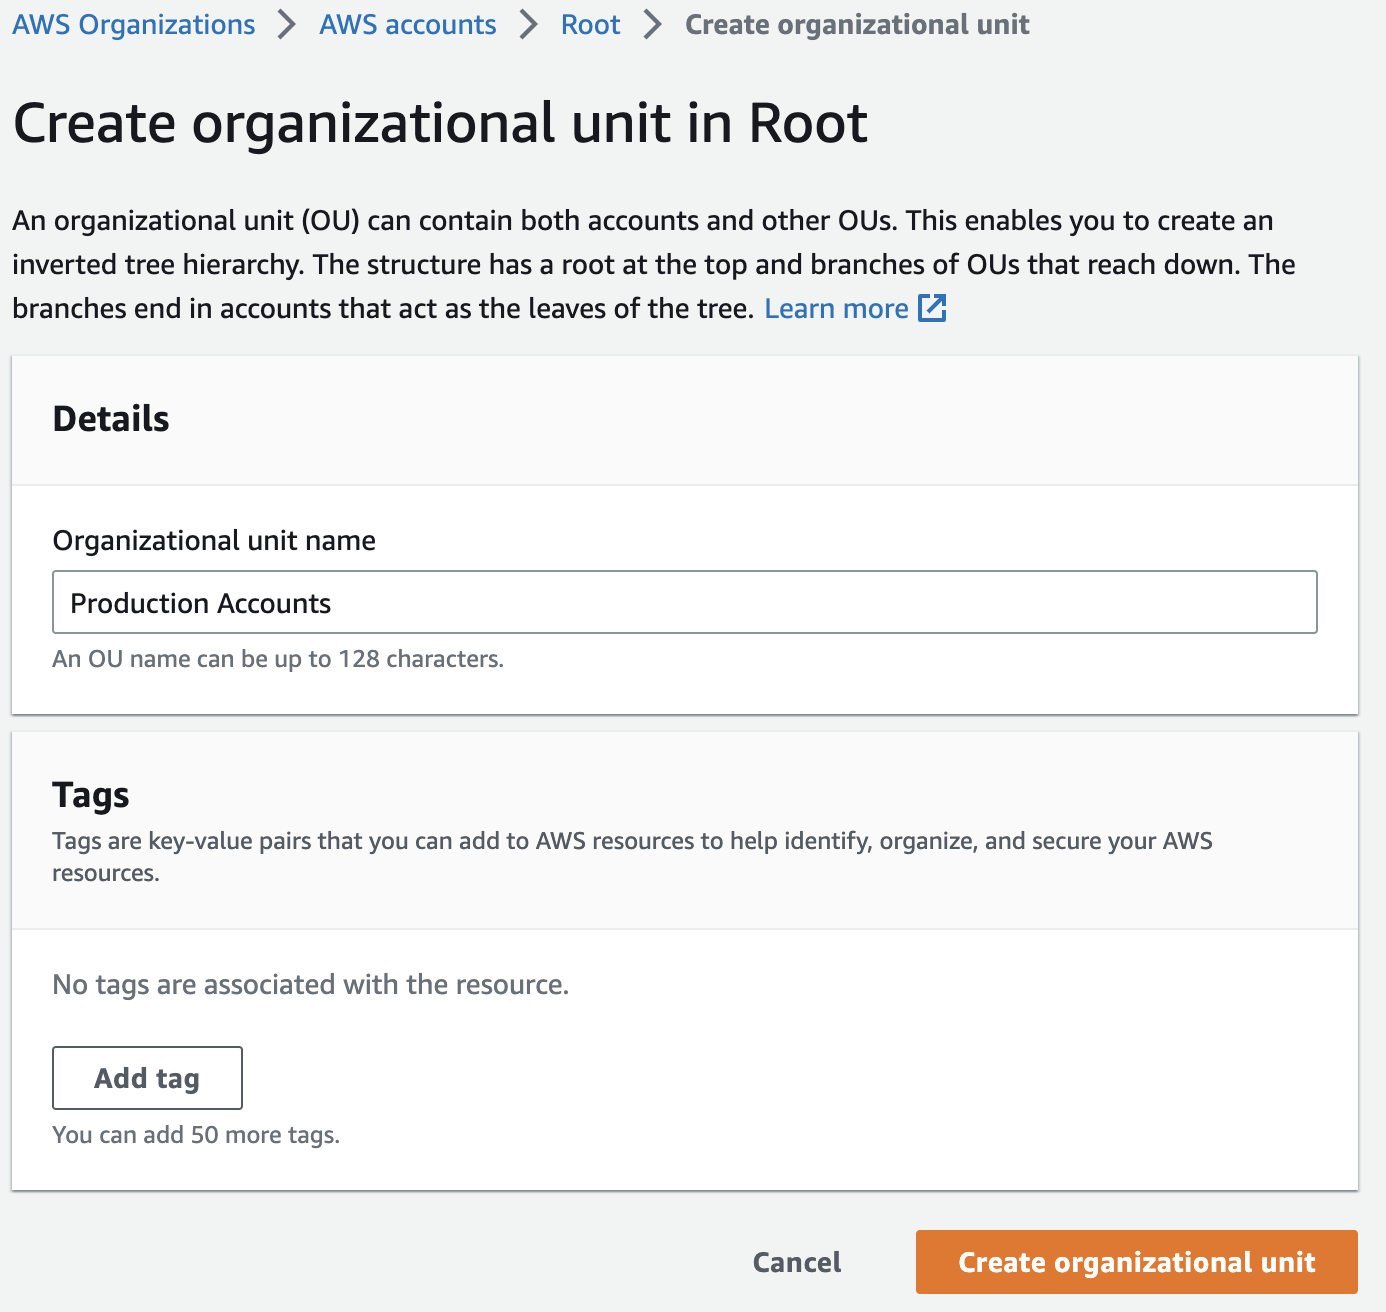
Give it a name.
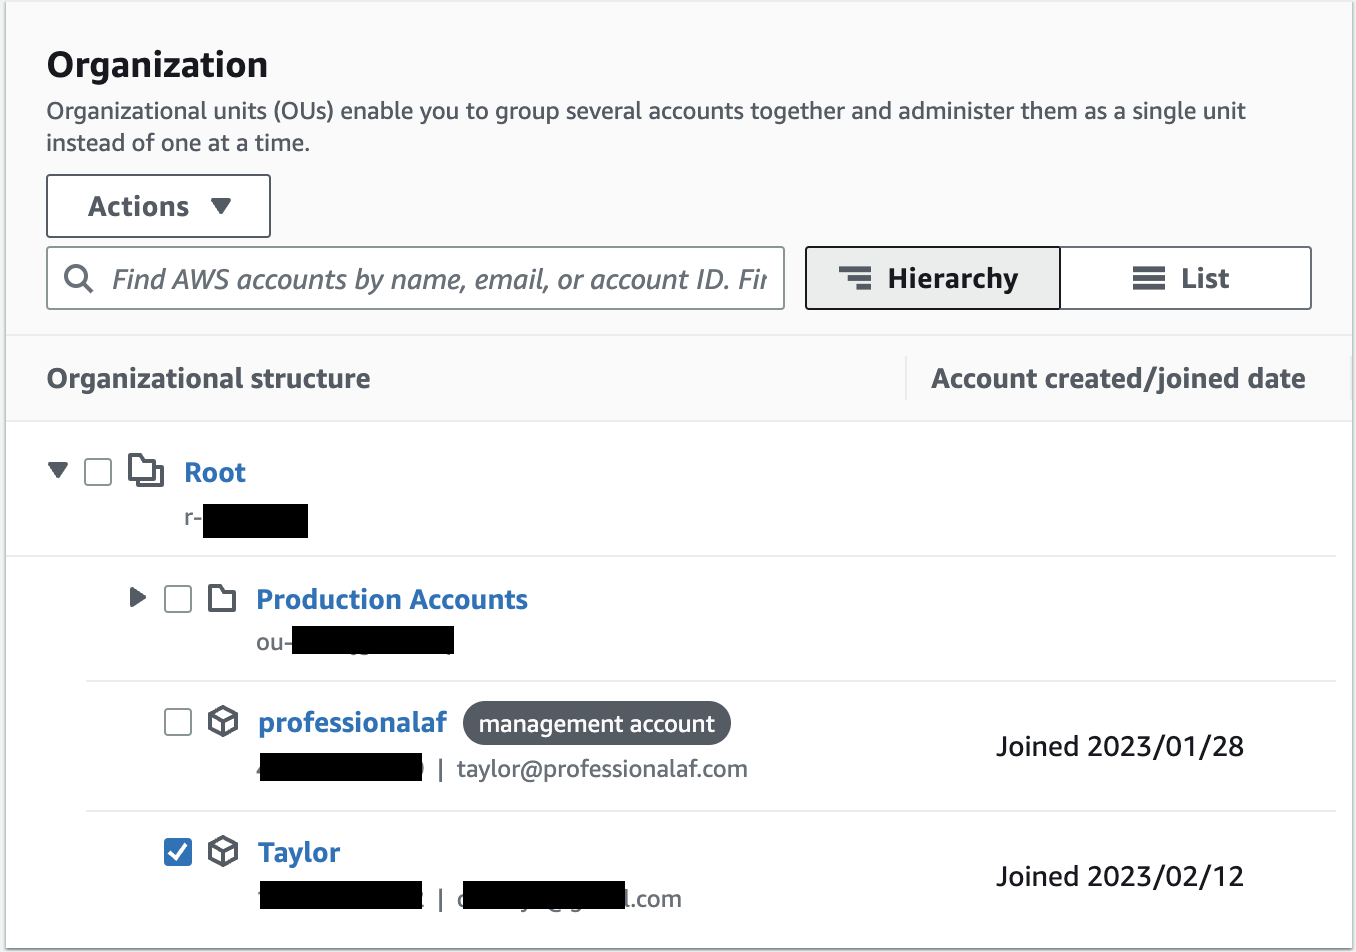
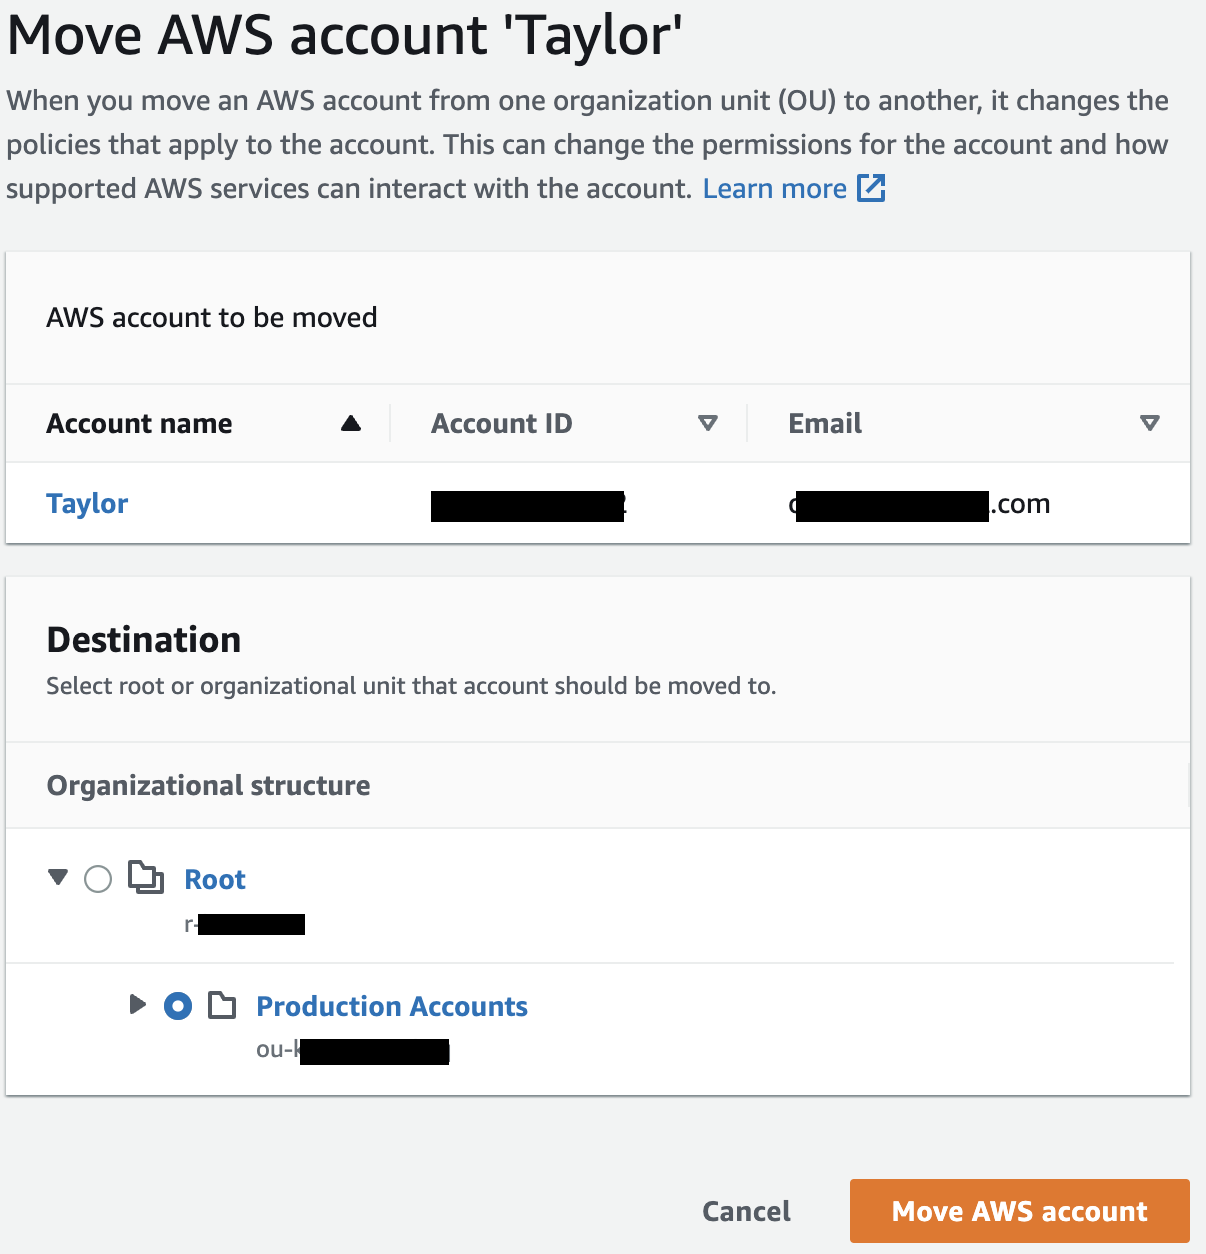
Once created, you’ll see your new OU. Check the box next to your newly invited AWS account, then click Actions -> AWS account -> Move.
Choose your newly created OU and click Move AWS account.
Now you can expand OUs and view your account within the heirarchy.
This is the starting point for a well designed AWS account structure. Organize accounts in a way that works best for your company/org.
For example, OUs for dev, staging or production. or an OU per product with dev, staging and production accounts within.
Each OU can have it’s own Service control policies (SCPs).
But how do I now access?
We’ll set up AWS Identity Center for console/programmatic access to manage access to all accounts in part 2.